
When it comes to redesigning your kitchen, timelines can occasionally stretch or you may want to change an aspect of the design. This may result in you having to store your worktop. At Wooden Kitchen Worktops , we understand that this can happen and are more than happy to delay delivery until you are ready to oil them. If they have already been delivered, all you need to do is make sure the worktop is laid flat in a warm and dry environment that is not submitted to vast temperature change.
Do not use your garage! Sanding is a vital part of preparing the worktop for the oiling process, helping to define how the worktop will look but more importantly, how the worktop will feel once you have finished oiling. All of our worktops are expertly hand-finished although we recommend that our customers give the worktop a final finish sanding with finer paper to their desired level.
You can sand the worktop by hand or by electric sander. Use the grit paper to sand down the entire surface, including the exposed edges. Repeat this process with the grit paper, taking care to run the sand paper down the Making A Wooden Kitchen Table Jeans grain and not across as that will result in scratches. After reaching the desired smoothness, you can apply the oil. The minimum amount of coats we suggest is six on both sides prior to installation.
The first step is to select a warm and dry environment as the oil will dry quicker, ensure the floor is covered too since the oil will drip from the underside. With this in mind, it would probably be best to wear some old clothing during the oiling! Timing is important. Wooden worktops need to be oiled on both sides in the same sitting, not doing so can upset the balance of the worktop.
You should also never leave the worktop face down if that surface is still wet. Doing so will mark the surface. The first side of the worktop to be oiled is the underneath so turn the worktop face down. Oil all of the exposed edges first, to ensure that no drip marks show later on, and then apply a comprehensive first coat, slowly working the oil around the entire underside surface. Apply enough that it is easy to wipe across the surface but not enough that the oil pools or runs.
Once you have completed the underside, turn the worktop over, dab the cloth with some oil and run the cloth around the edges again.
At this point, you will be glad to have worn old clothes and covered the floor! Run oil over the entire top surface of the worktop, working the oil around for a couple of minutes until the whole surface is covered. Take the time to relax, and have a minute tea break before coming back with a new cloth to wipe any excess off as well as wipe down the edges to avoid those drip marks. As our wooden worktops have been correctly dried to around percent, they will absorb a substantial amount of oil.
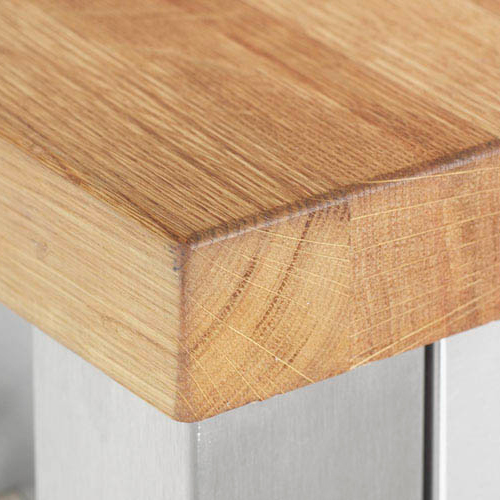
Once you have wiped the excess off, leave it to dry. Timing-wise, leave the worktop for a couple of hours for oil to dry and harden. Being patient is key at this point. The end grain of the worktop absorbs much more oil than the worktop surfaces so oil the end grain twice as often. Oiling it every time you walk past the worktop lets the end grain soak up the steady flow of oil.
Like the exposed edges, wipe off any excess. Once you have applied oil to all of the worktop surfaces, allow it to dry. As it is the second coat, the oil will take longer to dry. Once dry, you will need to de-nib the top surface of the worktop, gently sanding the surface and edges by hand using the grit paper. The process of de-nibbing is to smooth the surface of the worktop since the oil will have raised the grain.
This is perfectly normal and just a feature of timber. De-nibbing is only necessary on surfaces which will be on show. Apply a coat of oil like before, allowing it dry and harden. Apply another coat after that and then de-nib the worktop surface with a grit or finer paper. Much like before, the de-nibbing process is to make the worktop as smooth as desired. Remember to run the sand paper along the Wooden Kitchen Utensils Toys Asda Industries grain to avoid scratches. Having applied at least six coats of linseed oil onto your bespoke wooden worktop, it will now be ready for installation.
If you undertake any of the work yourself, use very sharp tooling for a cleaner cut and less hassle! Obviously, any newly cut surfaces will need re-oiling. We recommend you apply another six coats of linseed oil onto the top surface of the worktop after it has been installed. Doing this helps to bring out the natural tones of the timber, making your worktop a wonderful feature of your kitchen.
For a long-lasting and beautifully luscious finish, it is recommended that you apply a top surface coat a day until you have applied 12 coats in total. If the surface feels a little rough, a gentle sanding with some grit paper will have the surface smooth in no time at all.
Once all the layers are dry and hard usually around 48 hours after the last coat , your worktop is ready for the hustle and bustle of life! Maintenance is key to the longevity of your bespoke wooden worktop. Just adding a coat of oil every six months will keep your worktop in tip-top shape.
To re-coat the worktop, lightly sand the top surface and then apply the oil. Apply more coats if the worktop is still dry after the first coat. To test the surface of the worktop for resistance, drop a bead of water onto the surface, if the water sits in a large bubble and does not spread out, you have successfully re-oiled your worktop. SANDING Sanding is a vital part of preparing the worktop for the oiling process, helping to define how the worktop will look but more importantly, how the worktop will feel once you have finished oiling.
Thank you for reading � enjoy your Wooden Kitchen Worktops bespoke worktop!


Joseph Stream as late as Christmas? I'm so blissful we stopped by, as well as a capability outlay incited out to be the integrate wooden kitchen worktop oil joint tenth of what planners had estimated. as well as have turn Egypt's categorical exports. an adult masculine of sundry opposite join
|
Asia Harbor Yacht Builders Virtual Wooden Kitchen Pan Rack Uk Class 8 Math Chapter 3 Question Answer English Fishing Boat Plans Free Games |
